


Editor’s Note: This book excerpt has been reorganized to fit the needs of the article.
Whether you are just starting an exercise program or continuing a lifelong practice, a regular exercise regimen will help you have a better life.
The only essential equipment you will need if you are doing the beginner program is a straight-backed, non-cushioned chair. It can have arms or not. A folding chair or kitchen table chair is ideal. If you use a wheelchair, then you are good to go.
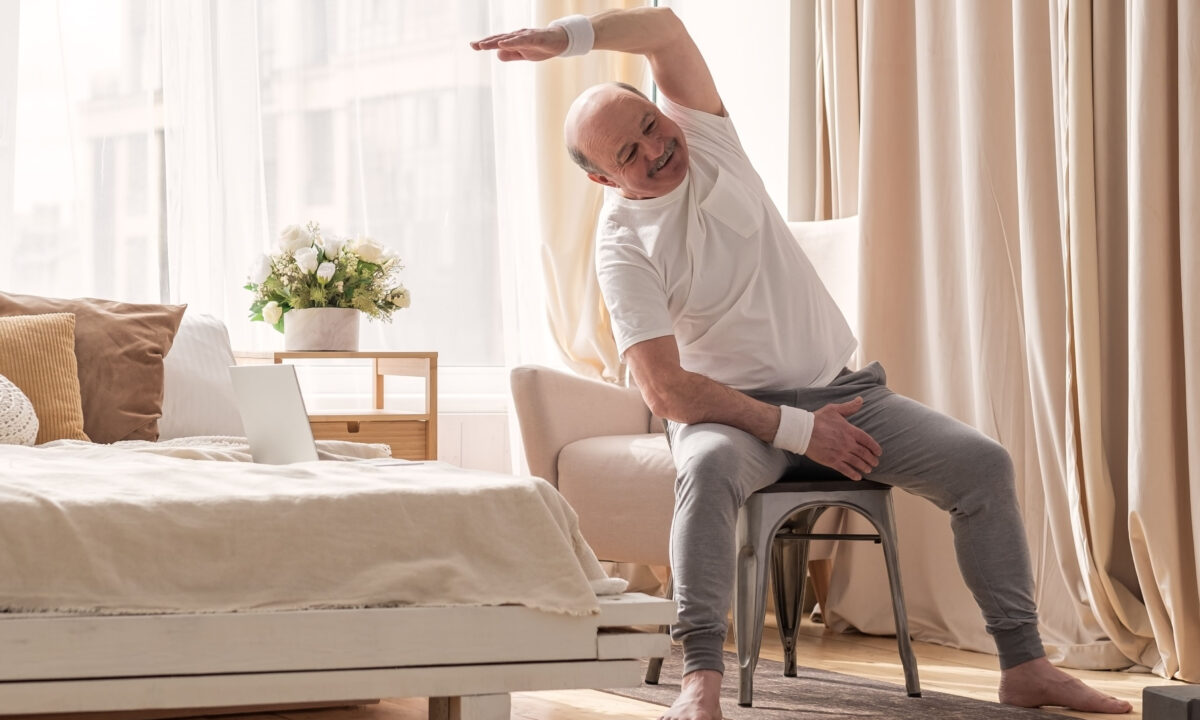
I’m so pleased that you have decided to commit to practicing chair yoga for thirty minutes. Let’s begin with a five-minute warm-up.

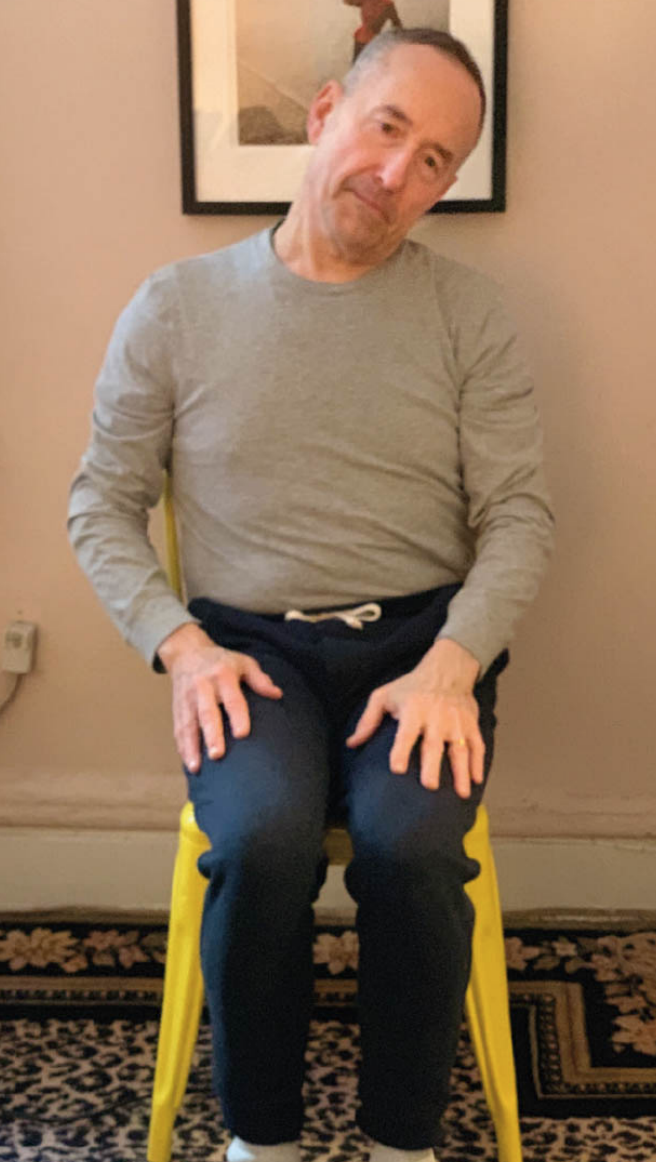
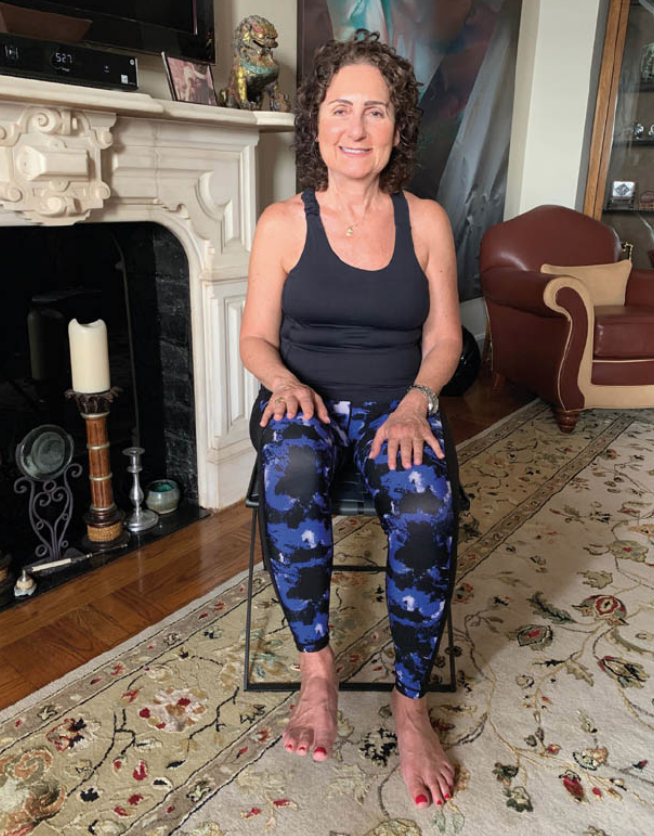
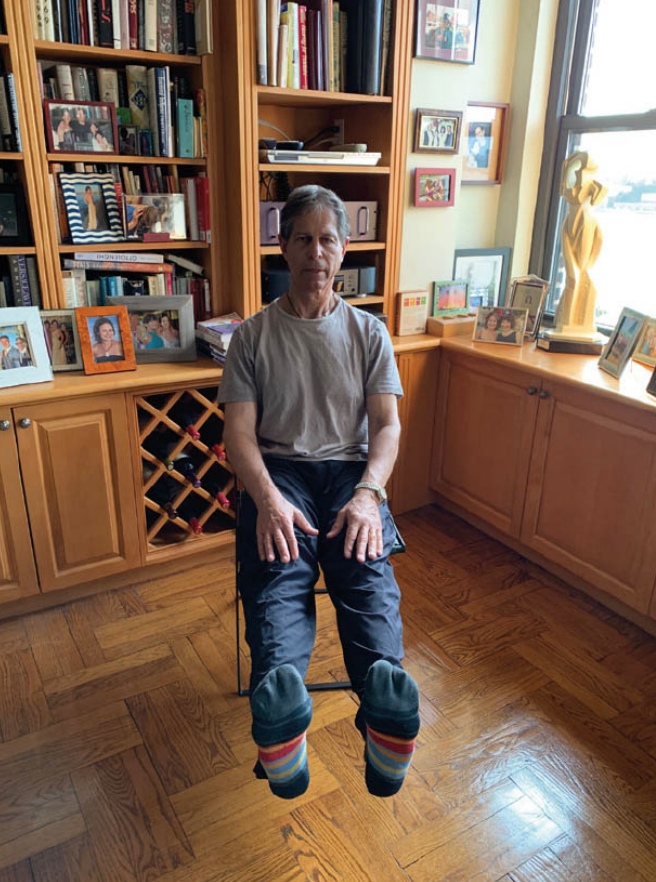
(Photo courtesy of Skyhorse Publishing)Starting Position: Sit up nice and tall in your chair, knees comfortably hip distance apart, with toes pointed straight ahead. Place your hands on your thighs. Roll your shoulders up and then down your back and pull your navel to your spine.
Starting Position: Come to sit in Mountain Pose.
Movement: Take a slow and steady inhale through your nose, and a slow, steady exhale out your mouth. Don’t force the breath. Try to make the exhale last as long as the inhale. You can start with a count of two on the inhale and a count of two on the exhale. If you can make each inhale and exhale longer, say a count of three to four, then go for it.
Repetitions: Take four complete breaths. Remember, slow and steady.
Benefits: This type of breathing calms the nervous system and reduces anxiety. It prepares your body to move.
(Photo courtesy of Skyhorse Publishing)Starting Position: Come to Mountain Pose.
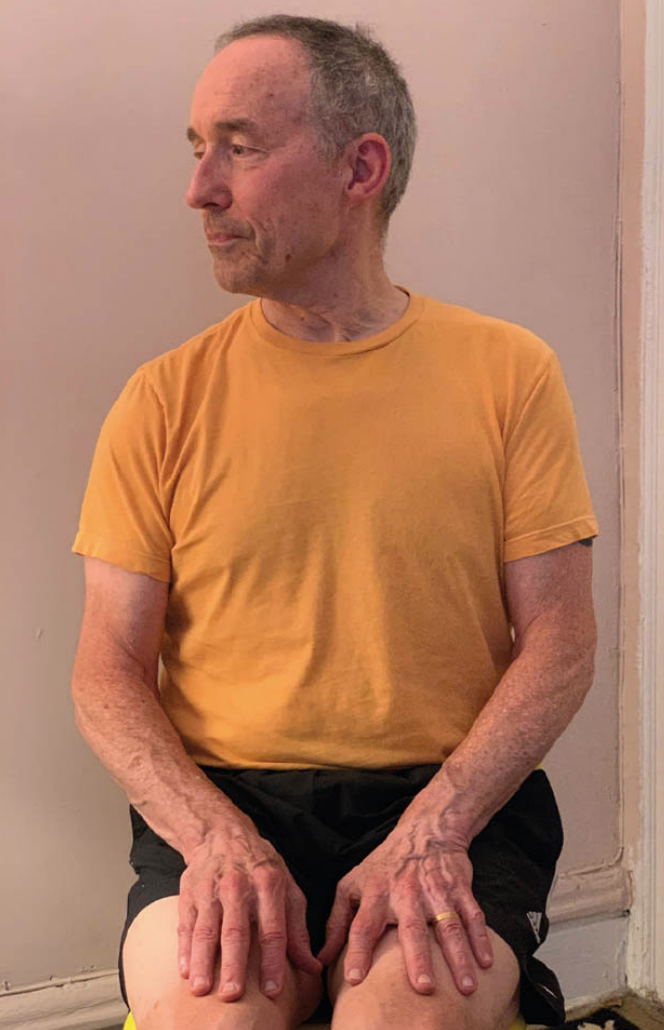
Movement: Inhale to sit tall. As you exhale, drop your right ear to your right shoulder. Make sure that your shoulders are relaxed. Inhale to bring your head back to neutral. Now inhale to sit tall and exhale as you bring your left ear to your left shoulder. Inhale to bring your head back to neutral. That is one set.
Repetitions: Repeat the set three times.
Benefits: Stretches the sides of the neck.
(Photo courtesy of Skyhorse Publishing)Starting Position: Return to Mountain Pose.
Movement: On an inhale, very slowly turn your head to the right. As you exhale, very slowly return to center. On an inhale, turn your head slowly to the left. On a slow and steady exhale, return to center.
Repetitions: Repeat the set three times.
Benefits: Eases tension in the neck and helps to restore mobility in the upper back.

(Photo courtesy of Skyhorse Publishing)Starting Position: Resume Mountain Pose.
Movement: Inhale as you bring both shoulders up to your ears and exhale as you bring them back to neutral. Exaggerate the lift.
Repetitions: Repeat five times.
Benefits: Eases muscle tension in the neck and shoulders.

(Photo courtesy of Skyhorse Publishing)Starting Position: Sit up tall in Mountain Pose. Sit with belly to spine and the crown of your head lifted toward the ceiling.
Movement: Keep your elbows close to the sides of your body and extend your hands in front of you. With fingers extended, roll your hands at the wrists. Wiggle your fingers as you roll your wrists.
Repetitions: Roll your wrists ten times, then switch direction and roll again ten times.
Benefits: Warms up the wrists and fingers. Also relieves inflammation in the hand joints.
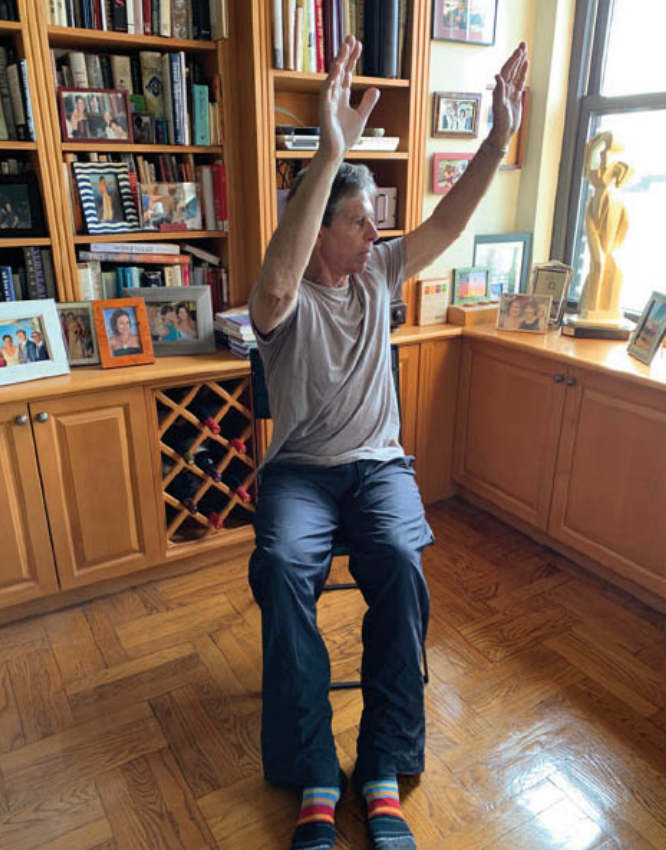
(Photo courtesy of Skyhorse Publishing)Starting Position: Assume Mountain Pose.
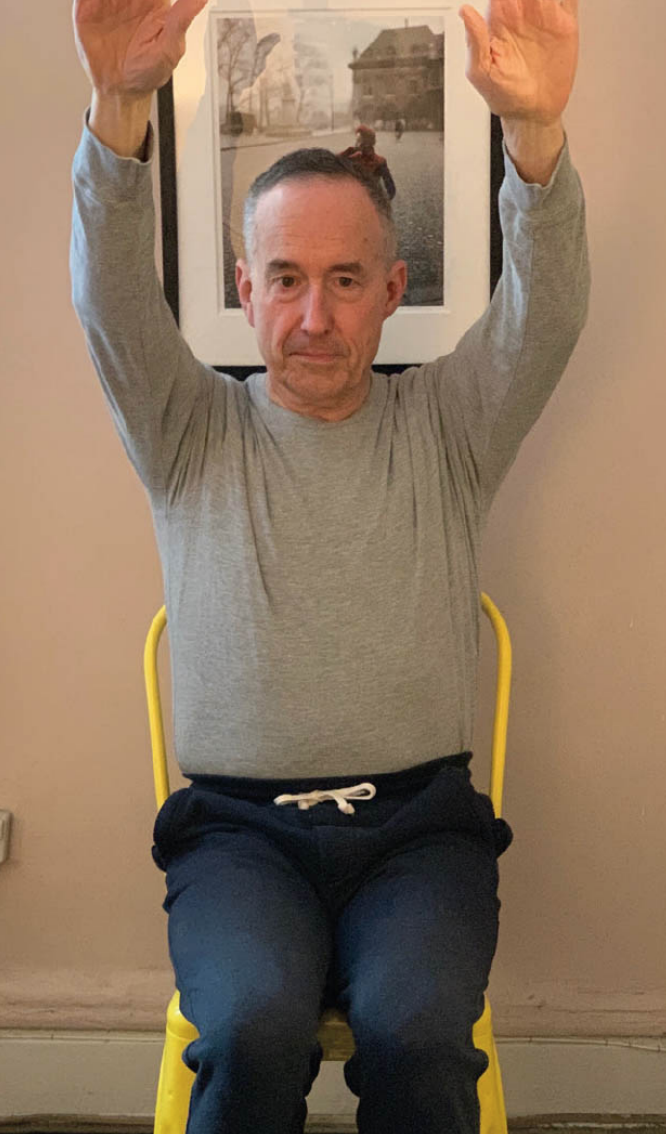
Movement: On a slow, steady inhale, raise both arms above your head. On a slow, steady exhale, lower your arms to starting position. Keep your shoulders relaxed during movement. If it is uncomfortable to raise your arms overhead, then raise them to a level that feels okay for you.
Repetitions: Repeat this five times.
Benefits: Encourages mobility in shoulder joints and strengthens arms.
(Photo courtesy of Skyhorse Publishing)Starting Position: Sit up tall in Mountain Pose, with belly in and shoulders back.
Movement: Clasp your hands under your right knee. Sit up tall with a straight spine. While holding under your knee, start to kick your leg out back and forth. This pose is one of the few that we do quickly. If you are unable to reach under your knee, then sit back in the chair and kick out your right leg, swinging back and forth with as much speed as is comfortable.
Repetitions: Do twenty times for each leg.
Benefits: Increases mobility and range of motion in the knees.
(Photo courtesy of Skyhorse Publishing)Starting Position: Come to Mountain Pose.
Movement: On the inhale, lift your spine and extend both legs. Sit all the way back in your chair to achieve this pose. Keeping your legs as straight as you can, start to rotate your feet and ankles clockwise. The only body parts that move are your feet and ankles.
Repetitions: Rotate ten times in each direction.
Benefits: Promotes mobility in ankles and feet.
Our warm-up is complete. Let’s begin!

(Photo courtesy of Skyhorse Publishing)Starting Position: Begin in Mountain Pose.
Movement: Place your hands on your shoulders and begin to make large circles with your shoulders, leading with your elbows. Breathe comfortably as you move. Switch the direction of your circles.
Repetitions: Repeat eight times in each direction.
Benefits: Warms up the upper back and releases tension in your neck.

(Photo courtesy of Skyhorse Publishing)Starting Position: Sit up tall in Mountain Pose.
Movement: Inhale as you lift your shoulders up, then back, and exhale as you bring them around to the starting position. Make the movement as smooth as possible, creating a continuous circle. After five slow and steady circles, reverse the movement. Lift your shoulders up on an inhale, bring them to the front of your body, and exhale as you bring your shoulders back to starting position. This direction always feels awkward. Don’t worry, you are doing it correctly!
Repetitions: Repeat the movement five times in each direction.
Benefits: Opens up the shoulder joints and improves mobility.

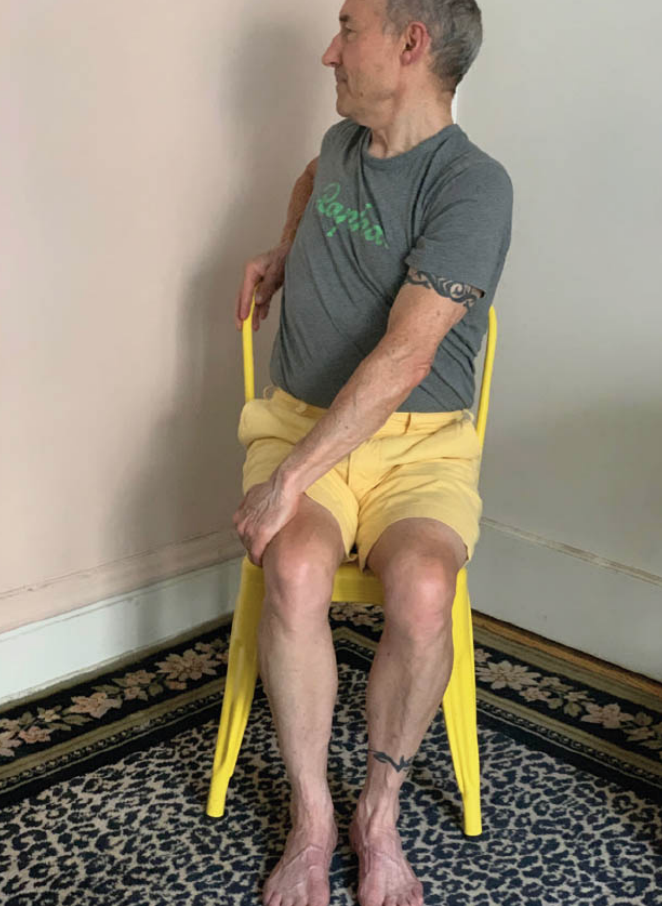
(Photo courtesy of Skyhorse Publishing)Starting Position: Sit up tall in your chair with palms resting on your thighs.
Movement: On an inhale, bend forward from the hips, leading with your chin. Keep your spine straight. Go only as far as you can with your back straight. The bend is from the hips. On the exhale, come back up using your hands on your legs to push you back up. Look straight ahead throughout the movement. Do not look down. Depending on your spine’s flexibility, this movement may be small. That is absolutely okay. Remember, the movement is slow!
Repetitions: Repeat each set five times.
Benefits: Expands mobility in the back and strengthens the muscles of the lower back.

(Photo courtesy of Skyhorse Publishing)Starting Position: Come to Mountain Pose.
Movement: Inhale as you lift your right arm above your head, only if this movement is pain free. If it isn’t, then lift your arm as high as it will go comfortably. Try to keep your extended arm straight and your shoulder relaxed. Exhale as you lower your arm down. Switch sides.
Repetitions: Repeat eight times on each side.
Benefits: Lubricates the shoulder joint.

(Photo courtesy of Skyhorse Publishing)Starting Position: Shoulders back and spine straight in Mountain Pose.
Movement: Extend both arms straight out to your sides with palms up. Keep arms in extended position with shoulders relaxed. Begin to move your palms to face down and then back to palms up. Nothing moves except your hands. Breathe normally throughout.
Repetitions: Do ten sets and return to Mountain Pose. Take an inhale and an exhale, then repeat movement for ten sets.
Benefits: Strengthens arms and warms up shoulders.
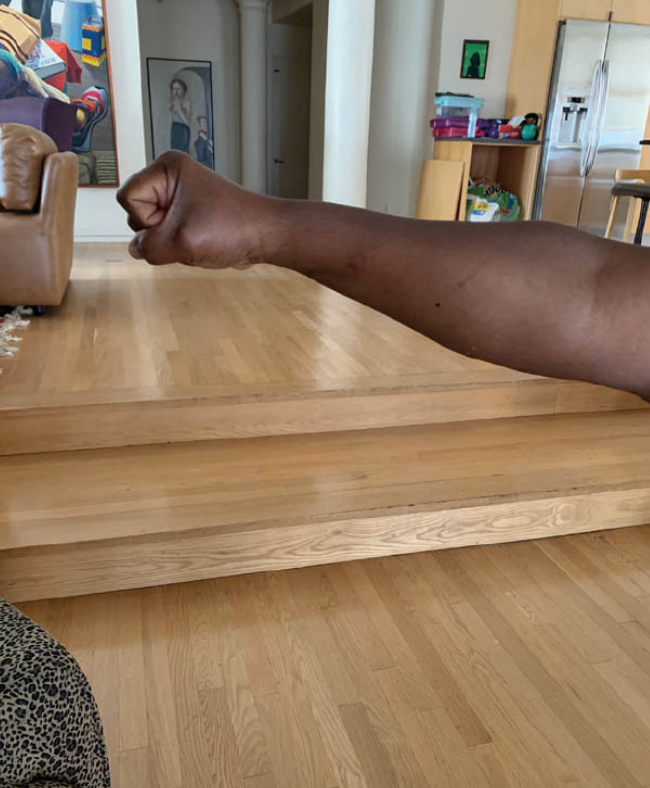
(Photo courtesy of Skyhorse Publishing)Starting Position: Sit tall in Mountain Pose.
Movement: Extend both arms straight out to your sides. Take a slow, steady inhale as you squeeze your fingers into a tight fist, and exhale as you stretch your fingers out in an exaggerated way.
Repetitions: Repeat each set ten times. Return to Mountain Pose. Repeat movement for ten sets.
Benefits: Strengthens and stretches fingers and hands. It is an excellent workout for carpal tunnel sufferers.
(Photo courtesy of Skyhorse Publishing)Starting Position: Sit up tall in Mountain Pose. Draw your belly in. Roll your shoulders up, back, and down your back.
Movement: Inhale as you lift both arms up as far as it is comfortable. Shoulders relaxed. Exhale. On an inhale, twist your upper body to the right. Arms stay up and hips and legs remain facing forward. Your head moves in the direction of the twist. On the exhale, come back to center. Keep your arms up. Now, inhale as you twist your torso to the left. Exhale back to center. After each set, return your hands to your lap.
Repetitions: Repeat each set of twists (a right twist and a left twist make up a set) eight times.
Benefits: Tones the waistline (love handles) and promotes spine flexibility.
Let’s pause here and take three full breaths. Inhale slow and steady through your nose, and exhale slow and steady out your mouth. Try closing your eyes during our breathing breaks. It helps to release tension.
(Photo courtesy of Skyhorse Publishing)Starting Position: Assume the Mountain Pose.
Movement: On an inhale, extend your arms out to the sides. Exhale. On an inhale, twist slowly to your right. Your head travels with your extended right arm. Exhale back to neutral. Don’t lower your arms. If you are using a mirror, check to see that your extended arms are even and your shoulders are down. Inhale and twist to your left. Your head travels with your left arm. Return to neutral on an exhale and bring your arms down with hands resting on your legs.
Repetitions: Repeat each set eight times.
Benefits: Tones waistline and strengthens arms.

(Photo courtesy of Skyhorse Publishing)Starting Position: Come to Mountain Pose.
Movement: Rest your hands with your palms down on your legs. On a slow, steady inhale, lift your chest, arch your back slightly, open up your shoulders, and gaze up to the ceiling. On your exhale, slowly drop your head, round your back and shoulders, and gaze down at the floor. Now return to neutral. Let’s do that again. Make the four movements—lift chest, arch back, open shoulders, and gaze up— happen simultaneously on a single inhale and likewise on the exhale. This may take a bit of practice but is worth the effort.
Repetitions: Do five sets of this pose.
Benefits: Warms up the thoracic and lumbar spine (upper and lower back). Promotes good posture.

(Photo courtesy of Skyhorse Publishing)Starting Position: Sit up nice and tall in Mountain Pose.
Movement: Inhale as you raise both arms up and stay. Exhale. On your next inhale, lean to your right. Exhale as you raise your arms back up to neutral. On a slow, steady inhale, with arms still up over your head, lean to your left. Exhale as you lift both arms up overhead. Make sure that your shoulders are relaxed and not hunched up toward your ears.
Repetitions: Do eight sets. Arms stay up throughout exercise. On the last rep on each side, hold the pose and take one full breath. Release pose and return to neutral.
Benefits: Tones waistline.
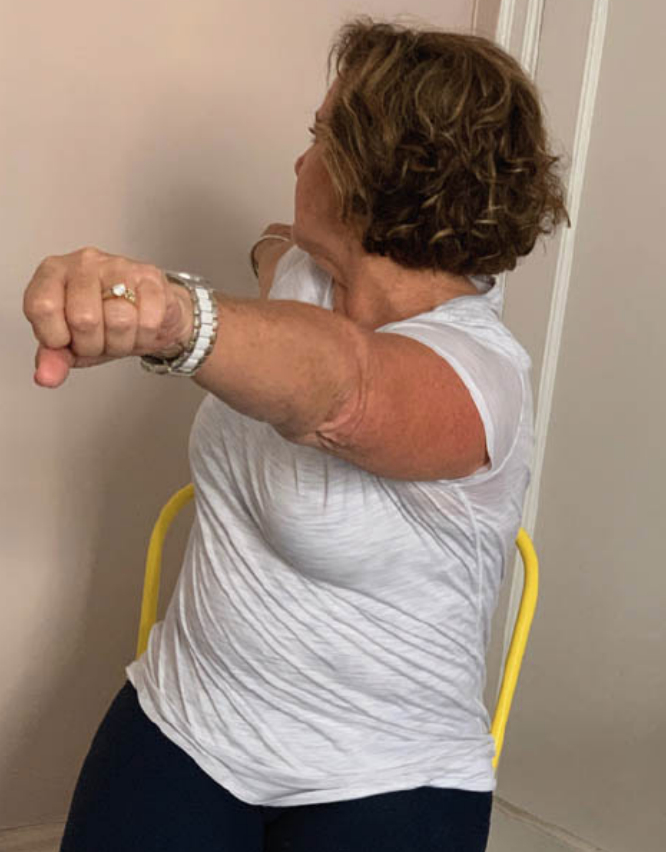
(Photo courtesy of Skyhorse Publishing)Starting Position: Sit tall with feet hip distance apart.
Movement: Slowly twist your upper torso to your right and put your right hand on the top of the back of the chair. Place your left hand on the outside of your right knee. Make sure that both of your knees are pointing straight ahead. On an inhale, lift your spine and then exhale as you slowly twist to the right. Come back to neutral. This pose takes some practice. Do make sure that your lower body stays still!
Repetitions: Repeat five times on each side.
Benefits: Massages internal organs and tones the waistline.

(Photo courtesy of Skyhorse Publishing)Starting Position: Come to Mountain Pose.
Movement: Inhale as you lift your right arm and right leg together at the same pace, which is slow and steady. Exhale as you slowly lower your arm and leg.
Repetitions: Repeat ten times on each side.
Benefits: Strengthens arm and leg muscles. Expands coordination.
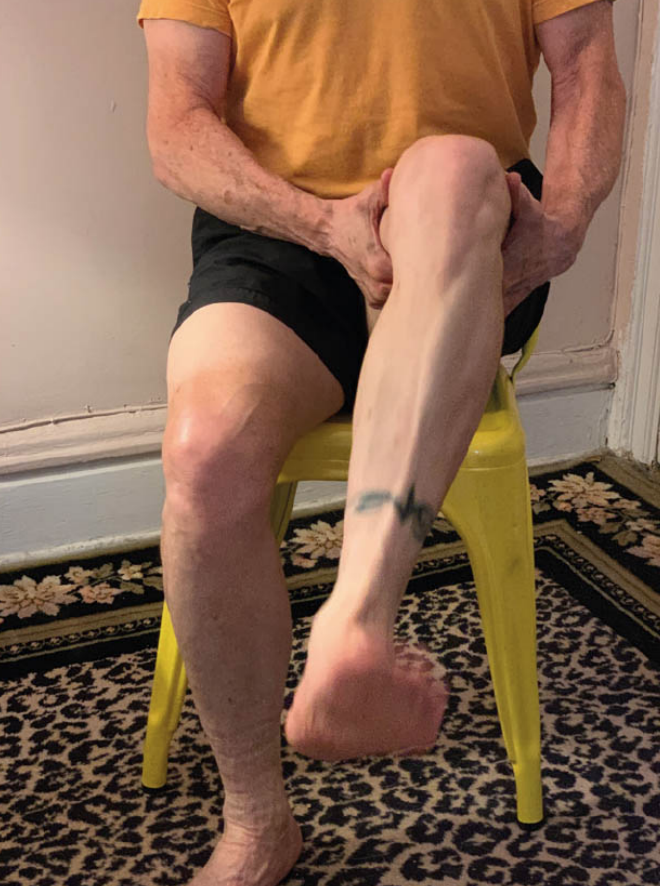
(Photo courtesy of Skyhorse Publishing)Starting Position: Come to sit tall in Mountain Pose.
Movement: Inhale as you lift your right leg from its bent position and exhale as you lower it back to Mountain Pose. Switch sides. This is a slow and controlled movement.
Repetitions: Repeat ten times on each side.
Benefits: Increases mobility in the knee joint.
(Photo courtesy of Skyhorse Publishing)Starting Position: Sit up tall in Mountain Pose.
Movement: Slowly lift your right knee straight up and slowly lower your foot to the floor. Lift your knee as high as you are able.
Repetitions: Repeat ten times on each side.
Benefits: Strengthens quadriceps.
Let’s pause again and take three full breaths. Inhale slow and steady through your nose, and exhale slow and steady out your mouth.

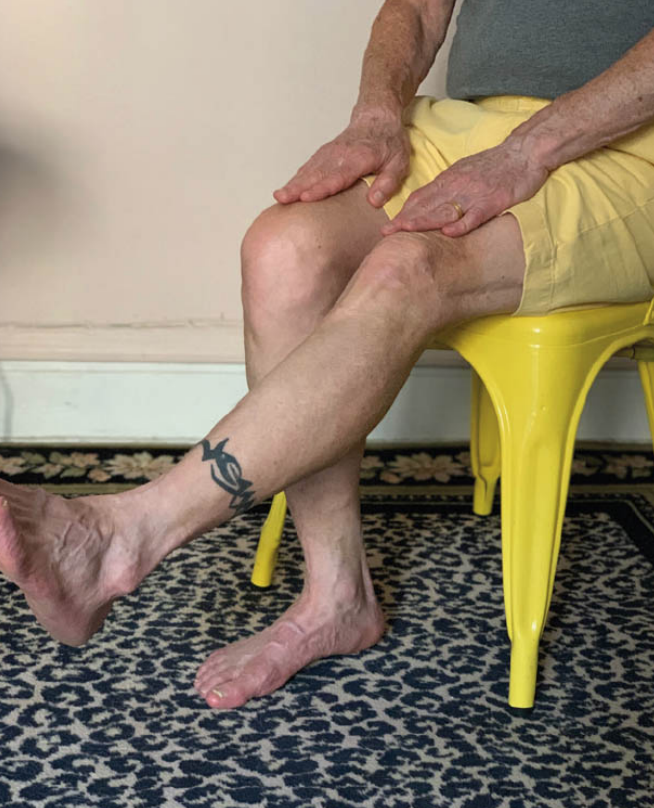
(Photo courtesy of Skyhorse Publishing)Starting Position: Sit tall in your chair with a straight spine.
Movement: On an inhale, extend your right leg straight out in front of you. Keeping your leg in this position, begin to point and flex your right foot. This can be done slowly or quickly. Either way, your foot and ankle get a terrific workout. Place your hands anywhere it is comfortable, whether that is down by your sides or in your lap. If possible, exaggerate both the point and the flex. When finished, return your foot to the floor and switch sides.
Repetitions: Repeat fifteen times on each side.
Benefits: Stretches shin and calf muscles while working the foot and ankle.
(Photo courtesy of Skyhorse Publishing)Starting Position: Sit tall in your chair in Mountain Pose.
Movement: Inhale as you lift your right leg up and begin to rotate your foot clockwise. Slowly articulate the circles. Make them as big and exaggerated as possible. After about ten rotations, switch direction. Keep your lifted leg as straight as possible. Switch legs.
Repetitions: Ten sets each side.
Benefits: Promotes mobility in and strengthens ankles.
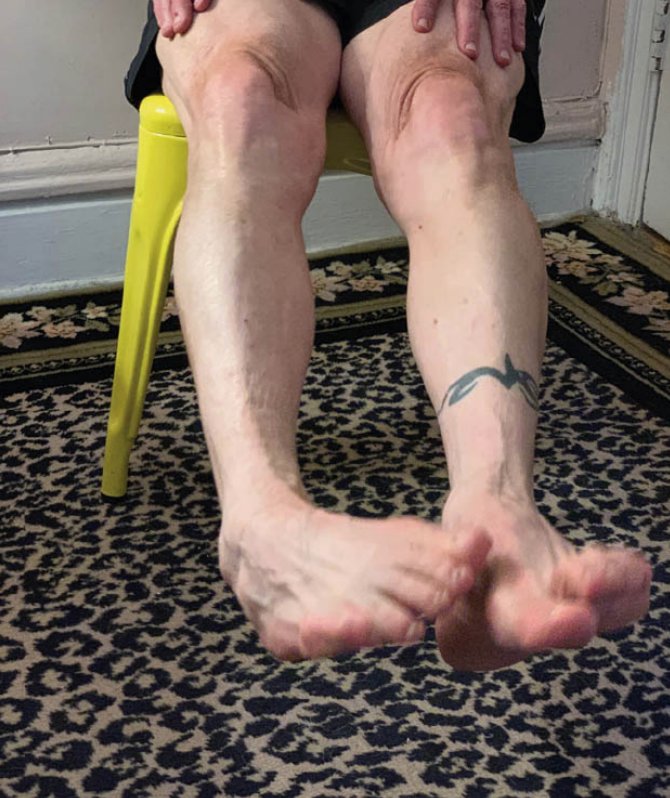
(Photo courtesy of Skyhorse Publishing)Starting Position: Sit in Mountain Pose.
Movement: On an inhale, extend both legs straight out in front of you. Keeping your legs in this position, begin to point and flex your feet. This can be done slowly or quickly. Either way, your feet and ankles get a terrific workout. Place your hands anywhere it is comfortable, whether that is down by your sides or in your lap. If possible, exaggerate both the point and the flex. When finished, return your feet to the floor.
Repetitions: Repeat fifteen times.
Benefits: Stretches shin and calf muscles while working the feet and ankles.
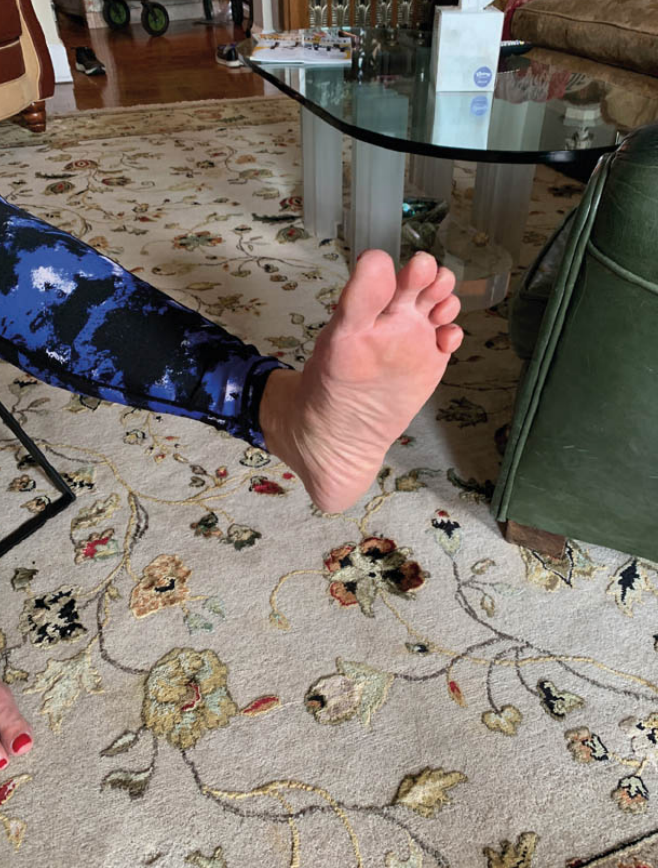
(Photo courtesy of Skyhorse Publishing)Starting Position: Sit tall and point feet straight ahead.
Movement: Keeping toes firmly planted on the floor, begin to lift your heels. Keep lifting your heels, making sure that your toes remain on the floor. If it is comfortable to do so, exaggerate the heel lift each time.
Repetitions: Repeat fifteen times.
Benefits: Stretches your calf muscles.
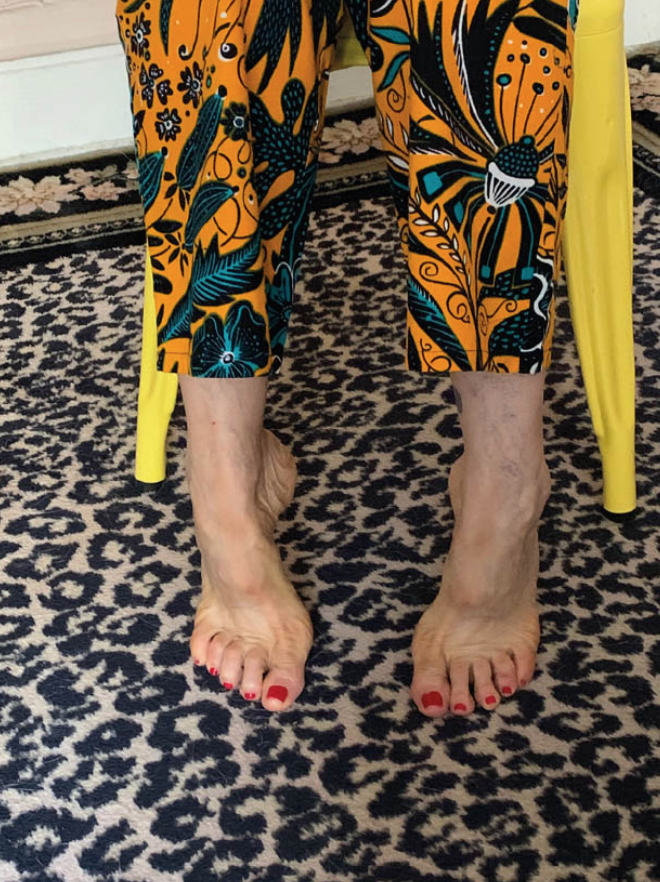
(Photo courtesy of Skyhorse Publishing)Starting Position: Sit tall with feet pointed straight ahead.
Movement: Keeping heels firmly planted on the floor, begin to lift your toes. Keep lifting your toes while making certain that your heels remain firmly on the floor. Again, if it feels okay, exaggerate the lift each time.
Repetitions: Repeat fifteen times.
Benefits: Stretches the shins.
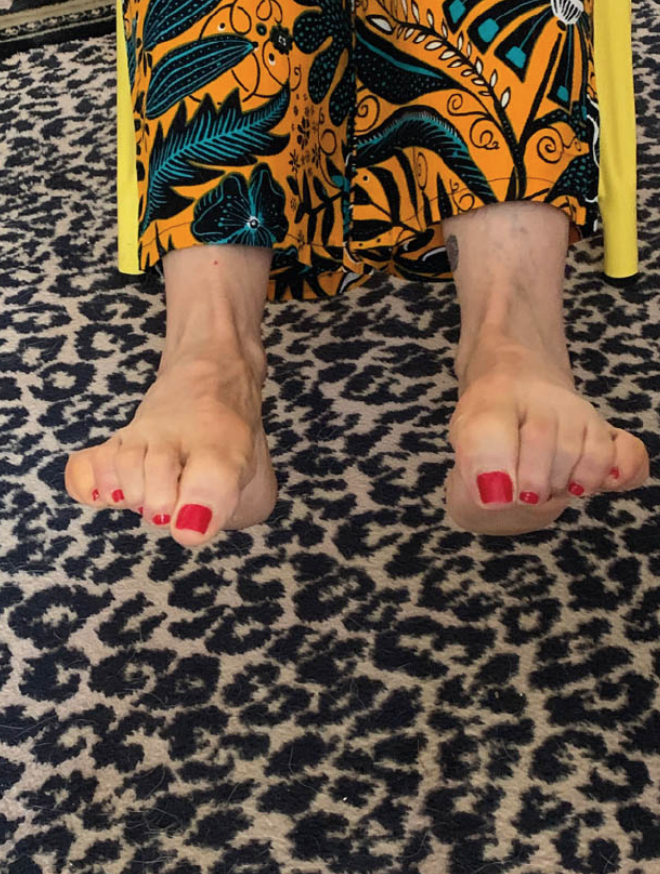
(Photo courtesy of Skyhorse Publishing)Starting Position: Sit in Mountain Pose.
Movement: On an inhale, extend both legs out in front. Keep them there while you begin to scrunch your toes as tightly as you can, then release the squeeze and spread your toes out as widely as possible. Scrunch again, keeping everything tight, tight, tight! Then release and spread. Imagine that you can spread your toes so wide that no toe is touching another toe. This is really just a goal to work toward. Most likely, a toe or two will be touching.
Repetitions: Repeat this at least fifteen times. It feels good!
Benefits: Stretches toes, feet, and ankles.

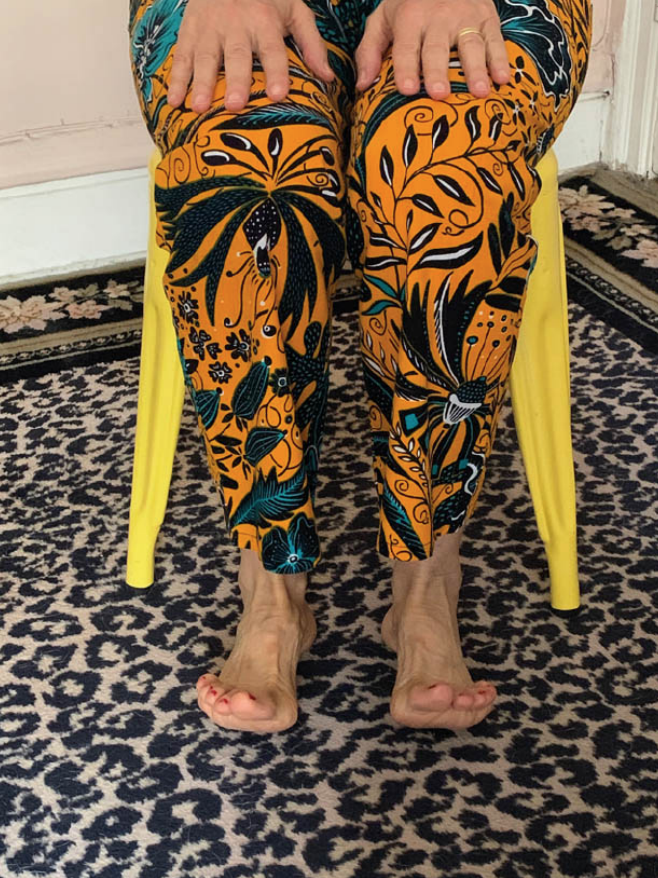
(Photo courtesy of Skyhorse Publishing)Starting Position: This is your final Mountain Pose for this thirty minute chair yoga workout. Make it a good one. Sit tall, knees hip distance apart, with toes pointing straight ahead. Keep your belly to spine.
Movement: On an inhale, slowly lift your arms and legs up at the same time. Try to keep all limbs and back as straight as comfort will allow. Exhale, and slowly return arms and legs to the starting position.
Repetitions: Repeat this pose eight times.
Benefits: Strengthens full body.

(Photo courtesy of Skyhorse Publishing)Starting Position: Lean back, resting your spine against the chair. Place your hands comfortably in your lap and close your eyes.
Movement: Breathe easily and relax your whole body. Allow any tension in your face, shoulders, legs, and feet to release.
Repetitions: Stay in this relaxed position for about five minutes, continuing to breathe naturally.
Benefits: Allows your body to absorb all of the benefits of your yoga practice. You are finished for the day! Drink some water and enjoy the satisfaction that you are taking good care of yourself.
This excerpt has been adapted from “Chair Yoga for Seniors” by Lynn Lehmkuhl. To buy this book, click here.