


What better time of year to show friends and family you love them than on Valentine’s Day? Especially this year! This beautiful Scandinavian craft is something the whole family will enjoy.
You will need:
Before you start, you might want to create a little ambience in your space to make your family time that much more enjoyable. Perhaps some music, or some heart-shaped cookies!
(Biba Kayewich)First, each person should choose two different colors of construction paper. Then, fold each piece of paper in half—the short way, not the long skinny way.
After that, cut each piece of paper into a “U,” making sure not to cut the side that’s been folded; trim the U from other side instead.
Then, starting from the folded side, cut 3 slits, evenly spaced, into each U. Be sure to make each slit the same length, leaving a nice “D” shape untouched at the end of each U. This will result in 4 slips of paper that are basically suspended from the D shape.
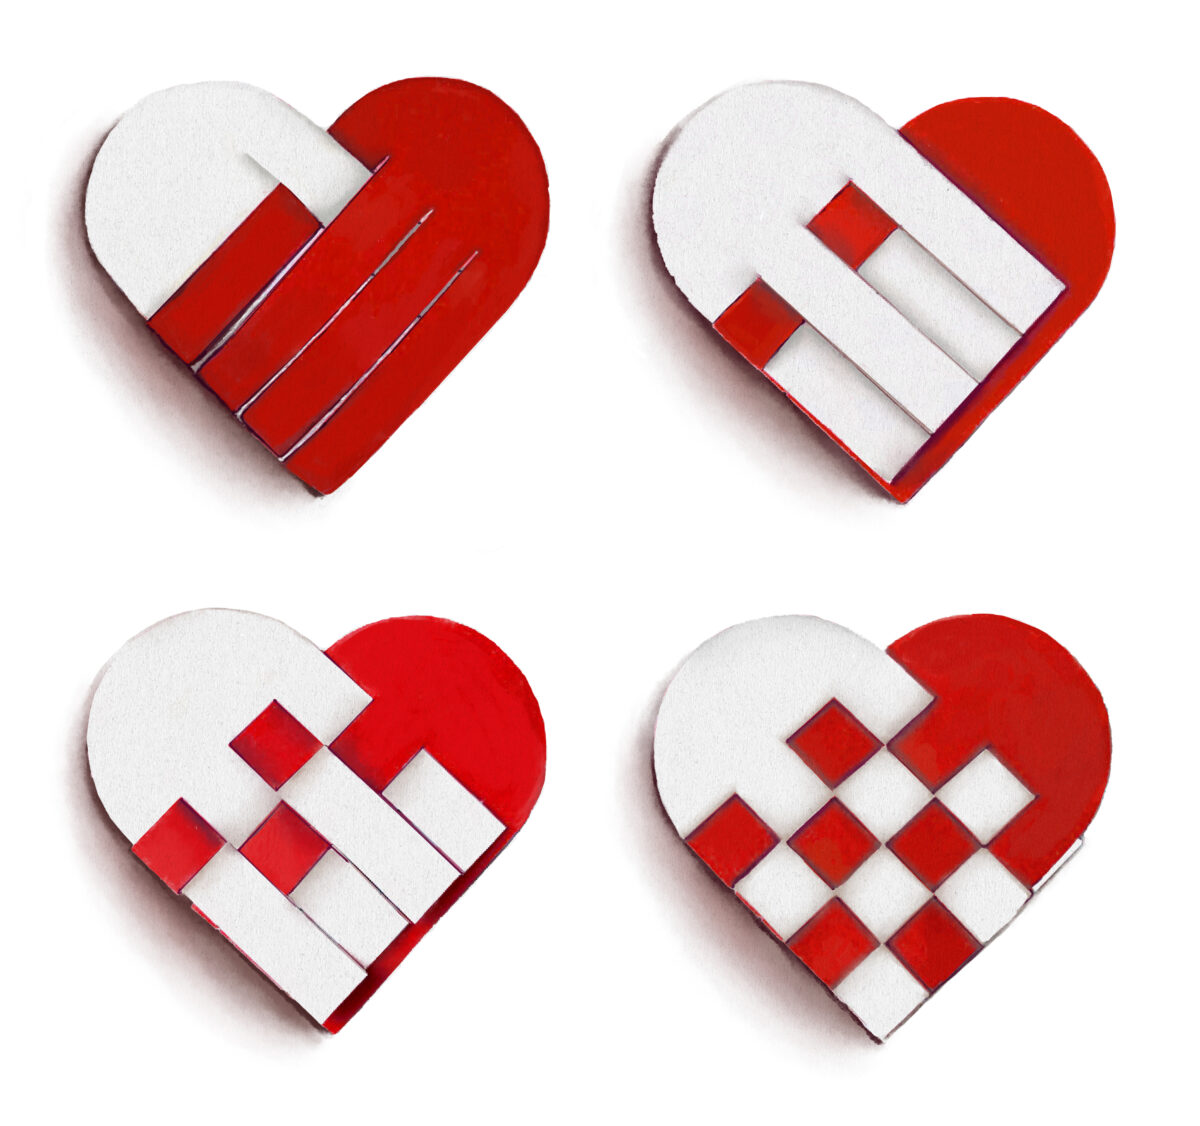
Okay, now you’re done with the simple part. Next is slightly harder, but totally manageable! It’s the weaving part. Yes, you’re going to weave the slips of paper together! To do this, first lay the U’s together, overlapping, so that they are laying in an overall heart shape. To do the first weave, feed the slip from the top edge of one U through the top slip of the other U. Then feed the second slip from the other U through that first slip.
Continue alternating in this way until you’re done weaving the first slip. The remaining slips will be woven in the same way, but alternate which slip goes into which when you start so that nice little squares—a checked pattern—starts to develop. Keep going this way until you’ve woven all four slips of paper and developed a beautiful checked heart!
Note: While doing this craft, it’s necessary to manipulate (or manhandle!) the paper quite a bit, so don’t be afraid to. Just try to keep it looking nice along the way as much as you can. At first there may be slipups, like torn paper or not quite alternating the weaves correctly. But don’t worry—once you get the hang of it, it’s simple and fun.
Little ones—who haven’t quite developed those fine motor skills—can enjoy participating too! They could help choose colors, or do a little bit of the cutting. Or, at the end, they could draw on the hearts, apply glitter, or choose where to hang the hearts up in your home.
The classic version of this craft is done with one piece of red paper and one piece of white. So festive, and so Valentine’s Day!
But while the classic version is done in white and red, let’s face it—the boys in the family might want something else. But the good news is, as long as you choose two colors, the heart will come out beautifully!
Here are some other pleasing combinations:
Choosing colors with a little bit of contrast will give the checked pattern a little more pop, which will look great.
You could also get more artistic by choosing, for example, patterned origami or Japanese-style paper.
One fun way to make this a bit more challenging—say, for teens—is to see who can make the tiniest version of this heart possible. You might want to choose standard white printer paper for that, as it will hold up a little better during the weaving phase than construction paper will. Then at the end you can color it in so that it looks like you chose two colors.
You could expand on this variation by making something like a matryoshka doll (the name for those nesting wooden Russian dolls). In this instance, you would make many different sized hearts and nest them inside each other, one after another, and then gift them to someone.
Another variation, for a more permanent decoration or memento, is to make some hearts out of felt. Don’t forget to use two contrasting colors! Felt hearts could even be fun coasters to use during the month of February.
So now you’ve made some loving hearts as a family. You can hang them up around your home, but why not also share them by sending them out in the mail? They make great Valentine cards too, or can be mailed with something inside of them as a little surprise.
If you do mail these hearts out to friends or family, bear in mind that standard envelope sizes will take a regular-priced stamp, but if you make your own envelope or go outside of standard dimensions, then you’ll need to pay a little more for postage.
Another way to spread Valentine’s love is to make them into little carrying baskets. Simply cut out another slip of paper or find a pretty ribbon, then glue or staple it on as a handle. Then you can place something fun inside, like Valentine’s chocolates.
Another fun activity I’ve tried is to surprise a loved one on Valentine’s Day by decorating their room with these hearts before they come home. You can hang them from the ceiling with wrapping ribbon, or cut out construction paper spirals as the “string” to hang these hearts from, ideally from something high up for full effect.
No matter how you slice them, here’s hoping that they bring a little bit of joy to your family this Valentine’s Day!
Happy Valentine’s!